ASK THE EXPERTS
How to photograph food
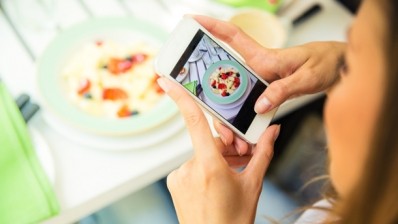
It seems these days that images of food are all around us - on TV shows fronted by celebrity chefs, on social media and in the press. Many food blogs featuring photos of beautiful dishes snapped in restaurants attract a strong following, so it's unsurprising that more and more restaurant owners and chefs want to promote themselves and their businesses through pictures.
However, there is now so much amateur food photography online that chefs and food professionals need to use high quality imagery in order to differentiate from the crowd and represent their creations in the best possible way.
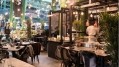
In the catering industry it's important to sell aspiration and communicate that through the crockery, the setting and styling of the food, the quality of the food, the provenance and creativity of the chefs.
So how can you achieve that with your photography?
The approach
Often photography is about imagining a shot in advance – having a vision of the image you think will work and then setting everything up to shoot it. The exciting part of photography is that there are always surprises along the way and other ideas that come to you in the moment. However, vision and imagination are key, you should know what you want to shoot before you pick up a camera.
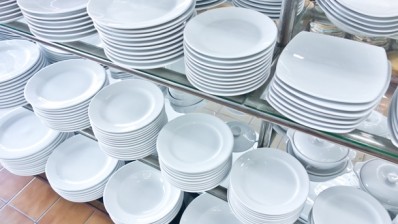
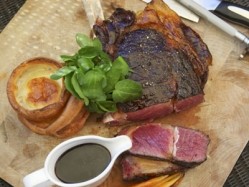
Note that brown food is hard to shoot, for instance steak, mushrooms and even black pudding, so think about the colour of the food before you start. Choice of plate and setting is also really important, so get this organised before you start.
If you are shooting dark-coloured food, it can be quite a knack to avoid the dish looking sludgy or losing the texture of the image, given that it is often so dark. To lighten the effect, I like to include shots of uncooked produce alongside the dish. You could place raw, chestnut mushrooms, on a rustic board, capturing them before they change shape and texture in the pan.
Making it look real
Food photography has a tarnished history of being fake, for instance, using mashed potato instead of ice cream and touching up raw ingredients with varnishes or glazes in the quest to produce imagery that displayed 'perfection'. The irony was that much of it didn't look real. Chefs these days want their food to look natural and real, so the days of heavy touch-ups are gone.
Often the main difficulty in shooting food is that it's wet and yet you want to avoid the dish appearing soggy, greasy or slimy. Also, bear in mind that a freshly cooked dish has about 50 seconds before it starts to deteriorate, so everything needs shooting quickly and accurately.
A good food photographer will know the dish before they start shooting it. They will understand the produce and how best to capture it. They will know that some dishes need an overhead shot, which will bring out the colours while others need shooting from a lower angle so you can see through the dish, to sense the height of a soufflé or bring out the differences in texture of the ingredients on the plate.
One of the most common photography downfalls is the use of light. Photographing a stunning dish at the pass might be great for the atmosphere of the kitchen, but it gives off a yellow light and won’t capture the beauty of the dish. Likewise, when a flash is used on an iPhone or automatic camera it rarely enhances anything. Always turn off your flash and bring the dish towards natural light if you can.
Professional equipment
There are so many delicious lenses, cameras, lighting systems out there that you could go on forever upgrading your kit. However, a workman never blames his tools. Whatever kit you have, learn to make the most of it, make the cameras work for you and push them to their limit – they love it.
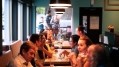
Remember, food photography isn't just about images, but about vision. If you're a chef, you'll want to document each dish as you're proud of everything that comes out of the kitchen. If you don't have the inclination to have a go yourself, find a professional photographer who will see the whole of your business, the life of your restaurant, the experience of your customers and be able to capture the atmosphere as well as the dishes themselves.
Each eating experience for the customer is about memories – celebrating special occasions, time to stop and enjoy food, good company, excellent service. A good photographer can help you to communicate this experience through their images.
Examples:
Hinds talks us through how she created these two shots.
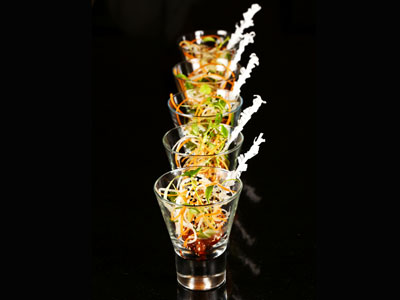
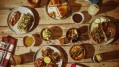
Sweet & Sour King Prawn amuse bouche (from Simpsons Cookbook)
Equipment: f11, 1/100th, ISO 200, 2 x softbox flash systems
These little dishes were always going to be better to shoot altogether than individually, and since the garnish covered some of the prawn, the impact would be better from a distance. I set up the light boxes at 45˚ angle and shot them in a darkened room on a semi-reflective surface of black marble so that the boxes would just light the glasses giving it the dramatic effect without glare on the glass.
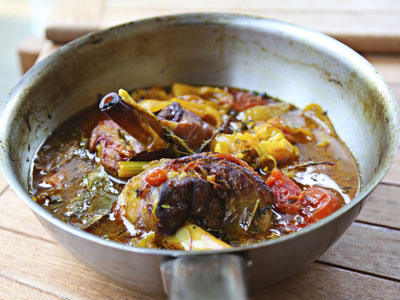
Braised Lamb Shanks with Ras al Hanout, Almonds, Piquillo Peppers, Apricots, Capers & Yoghurt (from Simpsons Cookbook)
Equipment: f3.2, 1/60th, ISO 640, natural light
This dish was plated up perfectly, but the rustic of the lamb shanks and the rim of the pan which hinted at hours of slow cooking was what I really wanted. I had 20 seconds once the pan came out of the oven and had planned to shoot it by the window with the available light.
Find more of Jodi Hinds' food photography here